Setup By Usb Disk
The WiFi Pineapple may be provisioned “headless” — meaning without intervention interactively. This means that you can take a fresh WiFi Pineapple Mark VII out of its box and set it up with the latest firmware and your settings of choice without connecting it to a computer or smartphone.
Preparing the USB drive
Once prepared, the USB drive will be properly formatted and contain a config.txt file, an upgrade-x.x.x.bin file, and optionally a device.config file (if using with Cloud C2).
Format the drive
The USB drive must contain only a single partition and be formatted as one of the following:
- ext4
- exFAT / FAT
- NTFS
Download the firmware
Once your USB drive has been formatted with a supported filesystem, Download the upgrade file from the Hak5 Download Portal to the root of the USB drive.
Make sure you keep the original name of the file (upgrade-x.x.x.bin).
It is best practice to validate file integrity by verifying the SHA256 sum of the download.
Create the config.txt
On the root of the USB flash disk, create a config.txt file using a standard text editor such as Notepad (Windows), textEdit (Mac), or vim/nano (Linux) containing the below information. Make sure the txt file is saved in ASCII format. Modify the settings as per your desired configuration.
  #
#
ROOT_PASSWORD="hak5pineapple"
HOSTNAME="pineapple"
TIMEZONE="utc"


#
#
#
# ETH_PROTO=static
# ETH_IP=192.168.100.100
# ETH_NETMASK=255.255.255.0
# ETH_GATEWAY=192.168.100.1
# ETH_DNS=192.168.100.1

#
# Management Firewall Configuration
#
# By default, the management firewall is configured to allow management
# access from the local ethernet and management wifi only
#
# FW_ALLOW_OPEN=1
# FW_ALLOW_WAN=1
#
# By default, all connections are allowed to NAT via the client or wan port
# connections.  To prevent that, disable egress NAT:
#
# FW_BLOCK_NAT=1


#
# Wireless AP Configuration
#
MANAGEMENT_SSID="Pineapple_Management"
MANAGEMENT_PSK="AGoodWPA-PSKPassphrase"
MANAGEMENT_HIDDEN=1
MANAGEMENT_DISABELD=0
OPEN_SSID="Open"
OPEN_HIDDEN=0
COUNTRY_CODE=US
#
# Filters Configuration
#
CLIENT_FILTER="ALLOW"
SSID_FILTER="ALLOW"
#
# Hak5 Cloud C2 Configuration
#
ENABLE_C2=1
#
# Software License Agreement:
# https://hak5.org/pages/software-license-agreement
#
ACCEPT_LICENSE=TRUE
Add the Cloud C2 provisioning file (optional)
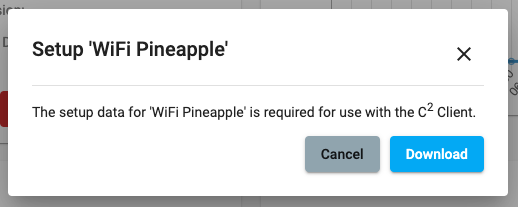
In addition to the config.txt and upgrade-x.x.x.bin files on the root of the USB drive, a Cloud C2 device.config provisioning file may be included.
To generate this file, create a new WiFi Pineapple device on your Cloud C2 instance, then navigate to the device’s overview page and click the Setup button from the description card.

Power on the WiFi Pineapple with the USB Drive
From a powered off state, place your USB drive into the USB Type-A port on the WiFi Pineapple, then connect it to a power source. Once the device is fully booted, it will automatically mount and find the upgrade file on the device. If the firmware file is valid, the device will then perform the firmware upgrade and reboot as indicated by the flashing red/blue LED.
During the firmware installation process, as indicated by the red/blue LED status, DO NOT disconnect the power source. Doing so will render the device inoperable.
Once the firmware has installed, you may connect to the WiFi Pineapple network and visit the web interface at http://172.16.42.1:1471.