On this page
article
Screen Crab Basics
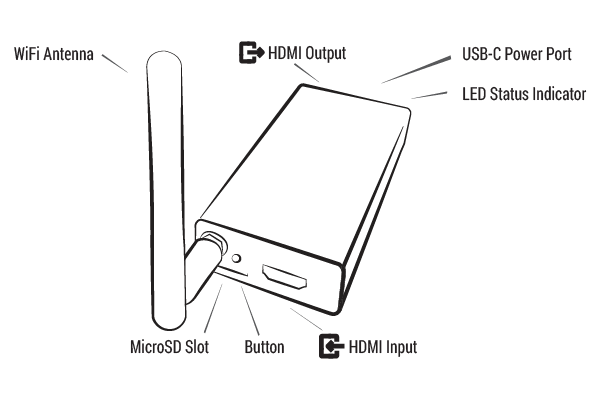
Out of the box the Screen Crab will save screenshots at regular intervals to an inserted MicroSD card. Follow these steps for the most basic deployment to get started.
- Using two HDMI cables (not included) plug the Screen Crab inline between an input (e.g. a computer, chromecast, console, etc) and an output (e.g. monitor, television, projector).
- Insert a MicroSD card formatted in either FAT32 or ExFAT.
- Power the Screen Crab using a USB-C cable (not included) with a power adapter capable of providing 5 watts (5 Volts, 1 Amp).
After a brief 30-second boot time, the Screen Crab LED will light blue to indicate that the MicroSD card is being written to with screenshots. To stop recording and eject the MicroSD card - press the button, wait for the LED to light solid Green, then eject the card.