Tips
ARMING MODE - Development Tricks
By Default the USB Rubber Ducky executes the payload immediately upon boot. While this is great for deployment, depending on the payload itself, this can become a pain point during development. Thankfully with the power of DuckyScript 3 there are MANY options to mitigate this problem.
Boot DELAY
During development it can be beneficial to add a DELAY to the beginning of your payload to provide a comfortable window to enter ARMING MODE safely. The longer the DELAY the less risk there is of accidentally missing the window and having your payload execute on your development machine.
Invert Default Behavior
Another way to make development easier is by inverting the default behavior with your payload. The below code will make the USB Rubber Ducky boot directly into ATTACKMODE STORAGE and only continue to entering ATTACKMODE HID and executing (the rest of) your payload after you’ve pressed the button.
  ATTACKMODE STORAGE
WAIT_FOR_BUTTON_PRESS
ATTACKMODE HID
REM payload after this line
There are many variants to the above technique; on a system like Windows that reflects lock states you could easily replace WAIT_FOR_BUTTON_PRESSwith Lock key conditions. The example below will only execute (the rest of) your payload after you’ve turned caps lock on and then off…
  ATTACKMODE STORAGE
WAIT_FOR_CAPS_ON
WAIT_FOR_CAPS_OFF
ATTACKMODE HID
REM payload after this line
There are nearly countless creative ways to take advantage of DuckyScript 3 on the USB Rubber Ducky in this manner; while the opposite of the above use-case, this PROTECTED_STORAGE_MODE EXTENSION requires a secret combination to be entered using all three lock key states and the button before it enters ARMING MODE
Payload Development with Virtual Machines
Desktop virtualization allows you to run multiple operating systems on a single computer without the need for separate hardware. Desktop hypervisors such as Parallels, VMware Workstation, or VirtualBox enable you to create a virtual environment on your computer. This allows you to run different operating systems.
This can be helpful when testing USB Rubber Ducky payloads as it provides a way to simulate various target operating systems. This is particularly helpful for testing payloads in a safe, isolated environment without risking damage to your primary system.
Here are some tips for using the USB Rubber Ducky with a virtual machine.
Create a snapshot
Snapshots in virtualization allow you to capture a virtual machine’s state at a specific point in time, creating a backup of the virtual environment that you can return to at any time.
When testing USB Rubber Ducky payloads, snapshots can be particularly helpful because they provide a quick and easy way to revert to a previous state of the virtual machine if something goes wrong during testing. If a payload causes unexpected behavior or system instability, you can quickly roll back to a snapshot taken before the payload was loaded, allowing you to continue testing without having to reinstall the entire operating system or virtual machine.
This can save a significant amount of time and effort, making testing more efficient and effective.
Set USB Passthrough rules based on VID and PID
USB passthrough is a feature in desktop virtualization that allows USB devices to be connected and used directly with a virtual machine, as if they were connected to the host computer.
Most virtualization software allows you to specify which USB devices will automatically connect to the host operating system, and which will be connected to the guest virtual machine.
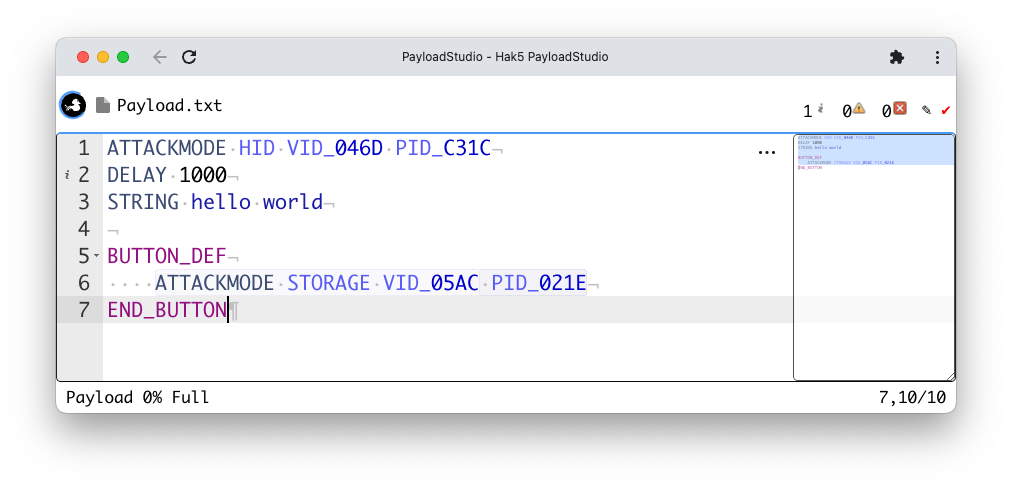
USB VID (Vendor ID) and PID (Product ID) values are unique identifiers assigned to USB devices. By specifically selecting certain VID and PID values to connect to the guest VM, and using these values in conjunction with the ATTACKMODE command when developing payloads, you may ensure that on attachment the USB Rubber Ducky will connect to the guest virtual machine.
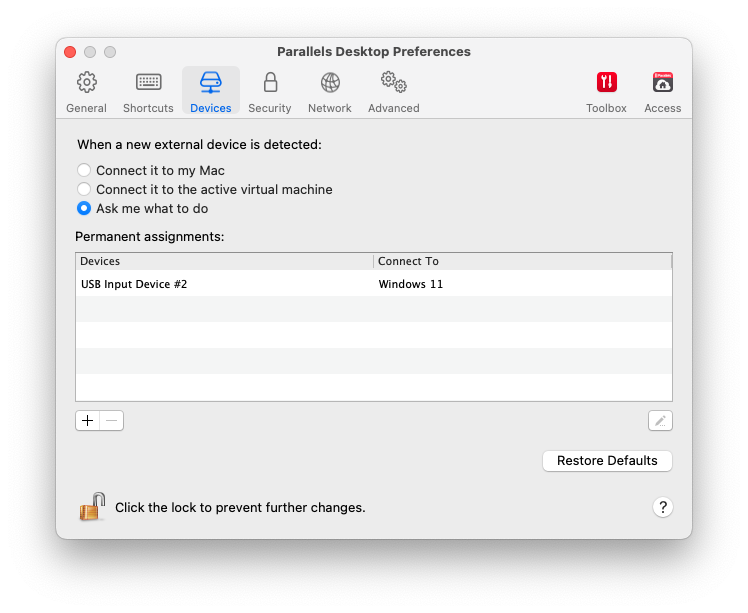
Example of a USB Rubber Ducky configured to automatically connect to a Windows 11 virtual machine using the Parallels desktop virtualization software
Similarly, by selecting a pair of VID and PID values for Arming Mode, one may configure the USB Rubber Ducky to attach to the host operating system — for example, on button press.
The same USB Rubber Ducky using a different VID/PID pair
In the above example, the VID and PID values 046D and C31C are configured as permanently assigned devices which will automatically connect to the Windows 11 virtual machine.
If the button is pressed, the VID and PID values 05AC and 021E will automatically connect to the mac OS host machine for further payload development and arming.