Installation And Setup
One of the best things about Cloud C² is that installation is easy. There is no installer and no complicated dependencies needed to be satisfied.
Rather, Cloud C² is a single executable with startup parameters passed as command line arguments. Upon first run, a database file will be created automatically. This way Cloud C² is portable and easy to manage.
To start, determine where the Cloud C² server will live. This will need to be a machine that can be accessed by both you and the deployed Hak5 devices. Typically a small VPS or other Internet-facing server will be used, though there are circumstances where a private-network only server may be desired.
In this example setup, we’ll assume that we’re using an Internet facing Linux server, though the setup process will be similar for Mac and Windows as all versions of the cross-platform Cloud C² server accept the same command-line arguments.
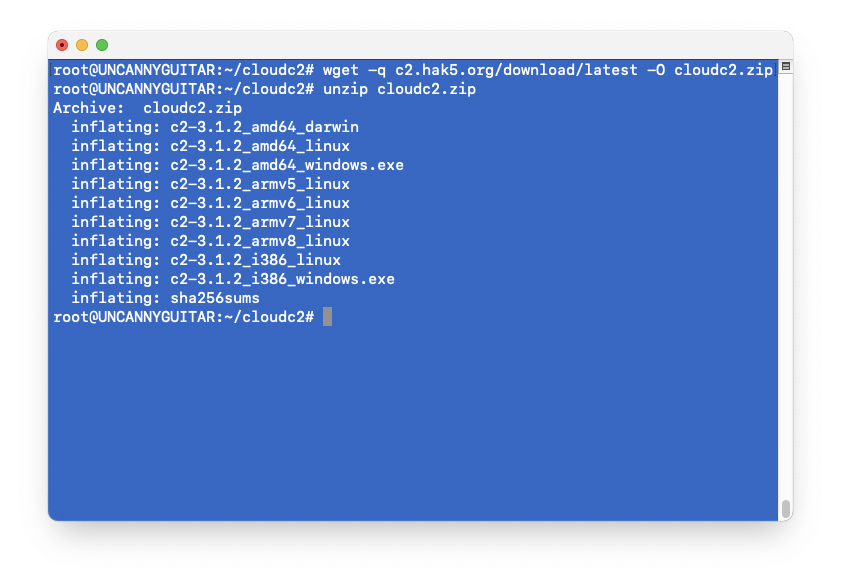
Start by connecting to the server by SSH or similar, then from the server download the latest version of the Cloud C²
  wget -q https://c2.hak5.org/download/latest -O cloudc2.zip
unzip cloudc2.zip
Running the Cloud C² binary without any arguments will show the usage.
  Usage of ./c2-3.2.0_amd64_linux:
  -certFile string
    	Custom SSL Certificate file (disabled letsencrypt)
  -db string
    	Path to the c2 database (default "c2.db")
  -debug
    	Enable server side debug logs. This will affect performance, only use while actively troubleshooting. Setting this sets -v automatically
  -hostname string
    	 REQUIRED - Hostname of server (ip or DNS name)
  -https
    	Enable https (requires ports 80 and 443)
  -keyFile string
    	Custom SSL Key file (disables letsencrypt)
  -listenip string
    	IP address to listen on (default "0.0.0.0")
  -listenport string
    	Port of the HTTP server (default "8080")
  -recoverAccount string
    	username to recover, specify a new password with -setPass
  -reverseProxy
    	If set, Cloud C2 will work behind a reverse proxy
  -reverseProxyPort string
    	If reverseProxyPort is set, this port will be the internet facing port the Cloud C2 will be available at
  -setEdition string
    	used to update a license key edition from the command line if UI fails
  -setLicenseKey string
    	 used to update a license key from the command line if UI fails
  -setPass string
    	password to set for user specified by name using the -recoverAccount argument
  -sshport string
    	Port of the SSH server (default "2022")
  -v	Set to get timestamped stdout output
At a minimum, Cloud C² must be run with the (-hostname) argument. This may be either an IP address or DNS name. If a DNS name is used, HTTPS may be enabled — either by supplying a custom SSL certificate file (-certFile), or by generating a Let’s Encrypt certificate (-https). In our example, we’ll choose a DNS name and the HTTPS option.
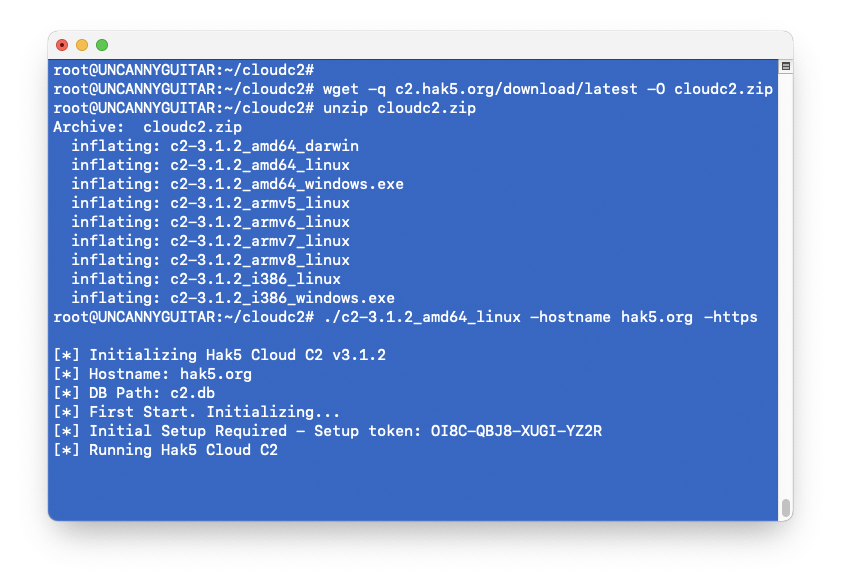
In this example, the hostname hak5.org is supplied. Replace this value with your server’s hostname — whether its public IP address or a domain name.
HTTPS requires a domain name. If your server does not have a domain, omit the -https option and use the server’s public IP address with the -hostname parameter.
The first time Cloud C² runs, a database file is generated. This will either be named c2.db automatically in the same directory as the Cloud C² binary, or as specified by the (-db) command line argument.
A setup security token will also display. This is important and will be needed to complete setup, so you may want to copy it to your clipboard.
SETUP
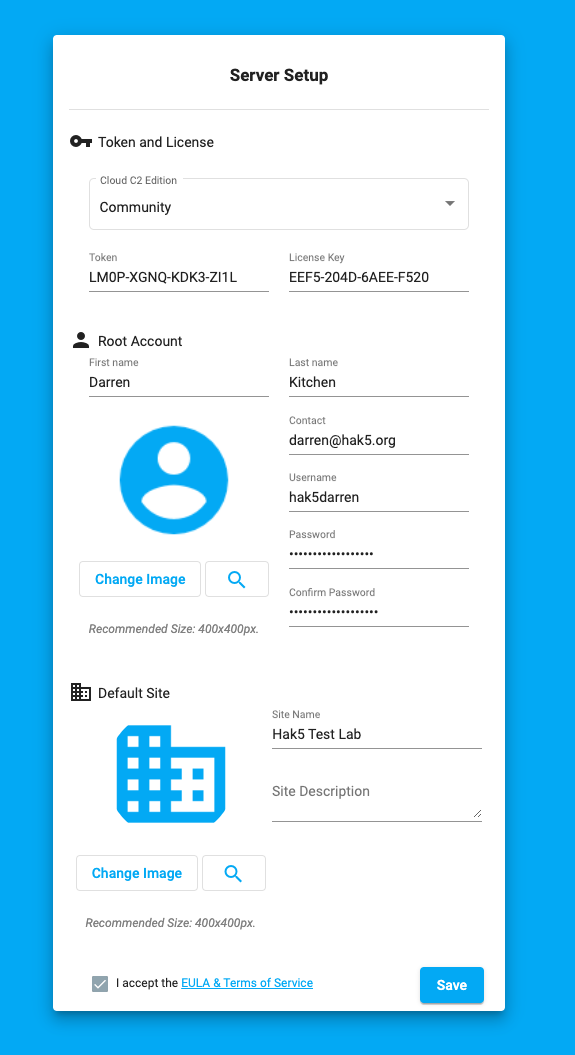
With Cloud C² now running, browse the the hostname of the server. You will be prompted for the setup token printed from the command line, as well as the license key provided by email. To complete setup, create an account, a default site, accept the license agreements and click Save.
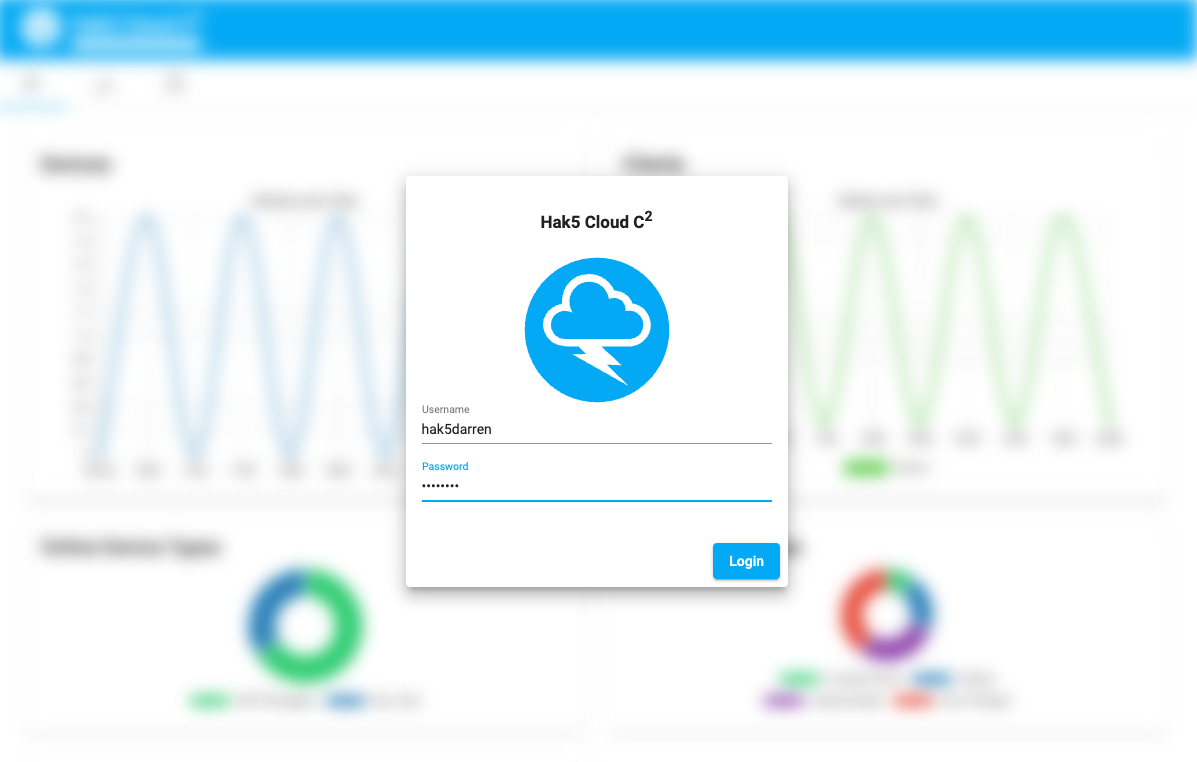
With setup complete, you may now login.
At this point the Cloud C² server is running. You may wish to add devices, learn about navigating the interface and managing devices.
With the above example command, the Cloud C² server will be running in an interactive shell. As a result, the server will stop when the session is terminated. To keep the server running when logged out, follow the guide to enable Cloud C² as a service on boot.