Adding Devices
Any networking configuration changes to your Cloud C² Server (hostname, port, protocol) REQUIRE you to redeploy your device.config to any previously connected devices – as it contains the information to properly communicate with C²
Begin by logging in to the Cloud C² web interface.
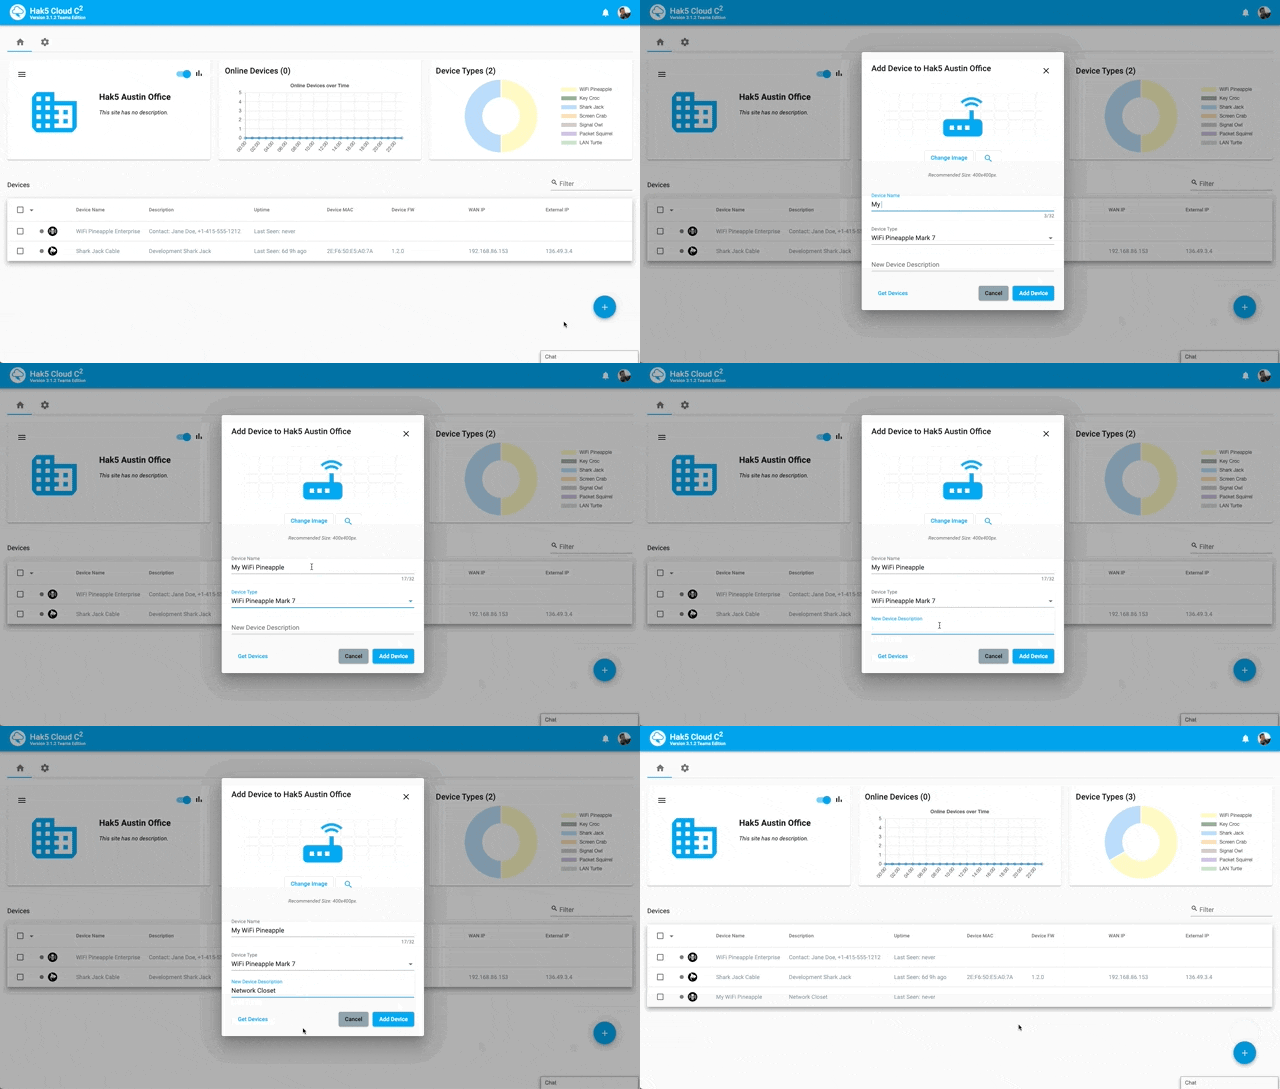
- From the device listing tab, click the (+) Add Device button
- Name the device, select the device type (e.g. WiFi Pineapple, Shark Jack), add an optional description and click Add Device\

-
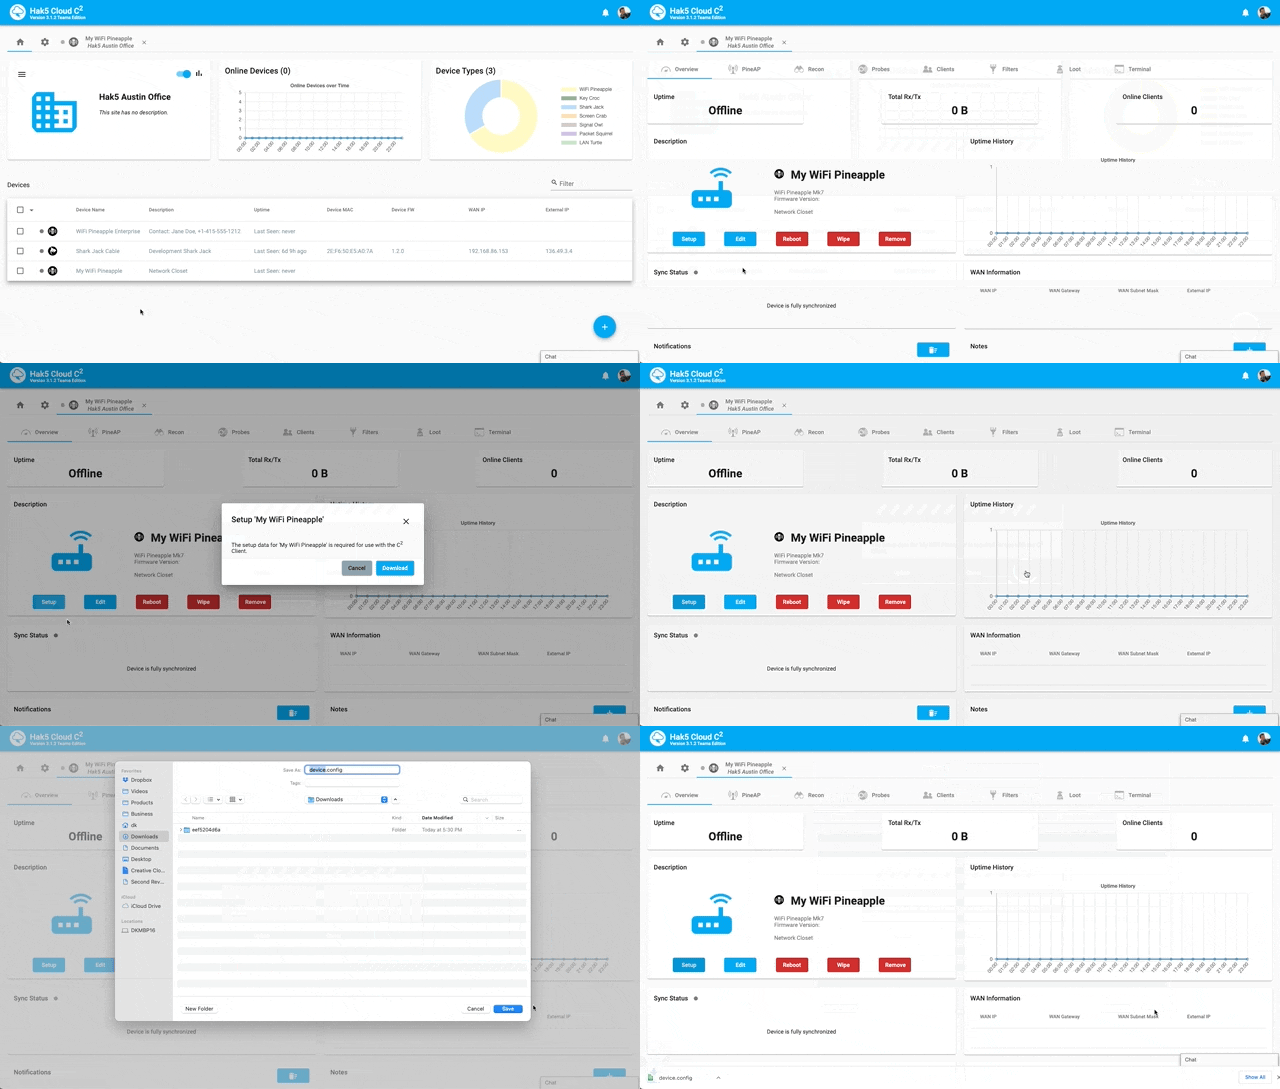
Click the on the name of the newly added device from the device listing tab
-
From the devices tab, click the setup button to download the
device.configprovisioning file\ -
Copy the
device.configprovisioning file to the device’s/etc/directory

For example:
WIFI PINEAPPLE
WiFi Pineapple – put device.config in /etc/
scp device.config root@172.16.42.1:/etc/
WIFI PINEAPPLE MARK VII and WIFI PINEAPPLE ENTERPRISE
With the WiFi Pineapple Mark VII, in addition to the above scp example, the device.config provisioning file may be uploaded from the web interface via the settings page.
LAN TURTLE
LAN Turtle – put device.config in /etc/
scp device.config root@172.16.84.1:/etc/
PACKET SQUIRREL
Packet Squirrel – put device.config in /etc/
scp device.config root@172.16.32.1:/etc/
SHARK JACK
Shark Jack – put device.config in /etc/ and use C2CONNECT in your payload
scp device.config root@172.16.24.1:/etc/
Then add the following to your payload:
C2CONNECT
SIGNAL OWL
Signal Owl – put device.config in /etc/ and use C2CONNECT in your payload
scp device.config root@172.16.56.1:/etc/
Then add the following to your payload:
C2CONNECT
SCREEN CRAB
Copy the device.config file to the root of the Micro SD card.
KEY CROC
Copy the device.config file to the root of the udisk in arming mode.
Deploy the device with Internet access as per usual and upon bootup the device will connect to this Cloud C² instance.